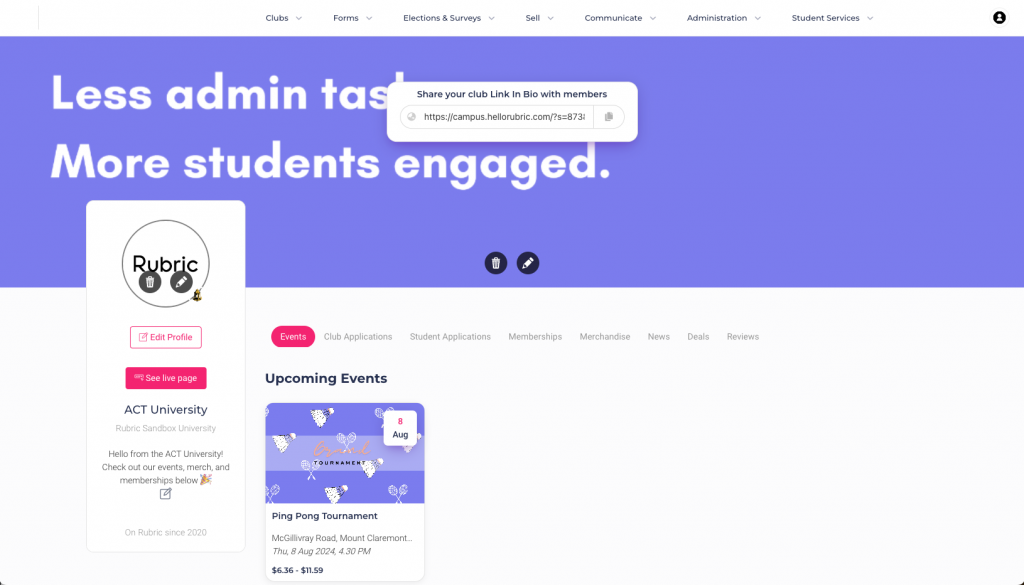
Link-in-bio
Your “Link in Bio” is the heart of your student union profile. It’s a one-stop hub where students can easily find all your info, stay updated on events, memberships, and merchandise. It keeps everyone informed and engaged, making it easier for students to connect with you and explore everything you offer.
Head to the top menu and click on Communicate -> Link-in-Bio to start setting up your profile!
- Drop your logo into the link-in-bio circle.
- Click on “Edit Profile” and add a quick description of your student union. You can also add your social media links.
- Add a banner image.
To publish events, memberships, and merch items from Rubric, head to the right tab and click “Get Started”. You’ll be redirected to a creation page.
Events, memberships, and merch items that you’ve already created directly from your portal will automatically show up on your link-in-bio.
You can also add links from other websites to your link-in-bio by clicking “Add an existing link” under the right section.
Forms that you create and activate under the Forms section of the portal will automatically appear on your link-in-bio under the “Club Applications” and “Student Applications” tabs. This makes it easy for clubs and students to visit your profile and quickly fill out their applications.
Add short blog posts or news articles from the News section of your link-in-bio. For each article, you can add a title, content, links, and a banner image.
Reviews will appear on your link-in-bio and your club’s link-in-bio if enabled in the settings. Once activated, students can add reviews to any purchase made from your page.
Reviews of 4 stars or more will automatically show up on your wall. Reviews of 3 stars or less need to be justified by students before being published.